
Yesterday I showed you another one of my "Treat Treasures", this Hershey Nugget Baggie with Topper!

Today I'd like to show you how I created it! Remember, I have these ready in to ship in small kits of (2) for only $5.00!(shipping is included in the $5 price!) Please see yesterdays post for information on how to purchase yours! :)
The Whisper Cardstock base piece measures 2.5" X 9"

Your base will serve as the Nugget "Tray" so you will need to score 0.5" from each side lengthwise as well as 0.5" from the bottom edge.

Using a Bone Folder, give the score lines a good crisp fold.

Make 0.5" cuts on both pencil marks as shown.

Place strong adhesive on the sections marked with the "X"

The "flaps" with adhesive will adhere to the backside of the larger middle "flap" creating a box-like edge.

Now flip to the opposite end and trim off the top corners of your tray, as shown.

Next, moving to your nuggets...this template size will easily hold (8) Hershey Chocolate Nuggets. Cover the backsides of each of the 1" X 3" strips with adhesive and adhere them to your Nuggets.

I did run a few strips of adhesive down the inside of my Tray just to keep them a little more secure. This step is completely optional as they are fairly snug when inside the bags.

Slide them into your bag...it's a great little fit, isn't it? (I love this stuff, LOL)

Okay, next let's put together the Medallion! Fan-fold your pre-scored medallion strip as shown.

Place adhesive on both ends of the strip and secure them together, Also cover the smallest grey circle (you have 3 included per kit) with adhesive.

Adhere your fan-folded medallion onto your circle (I'm showing you the upside down view) and press firmly.

Your dry adhesive will not be enough to hold your medallion in place, turn it over and fill the middle space with Liquid Glass.

Place another of the Grey circles onto the top while it dries. I also placed a couple of Acrylic blocks on top to ensure a good flat hold while the liquid glass was drying.

Begin building the piece to go on the front of your medallion as shown.
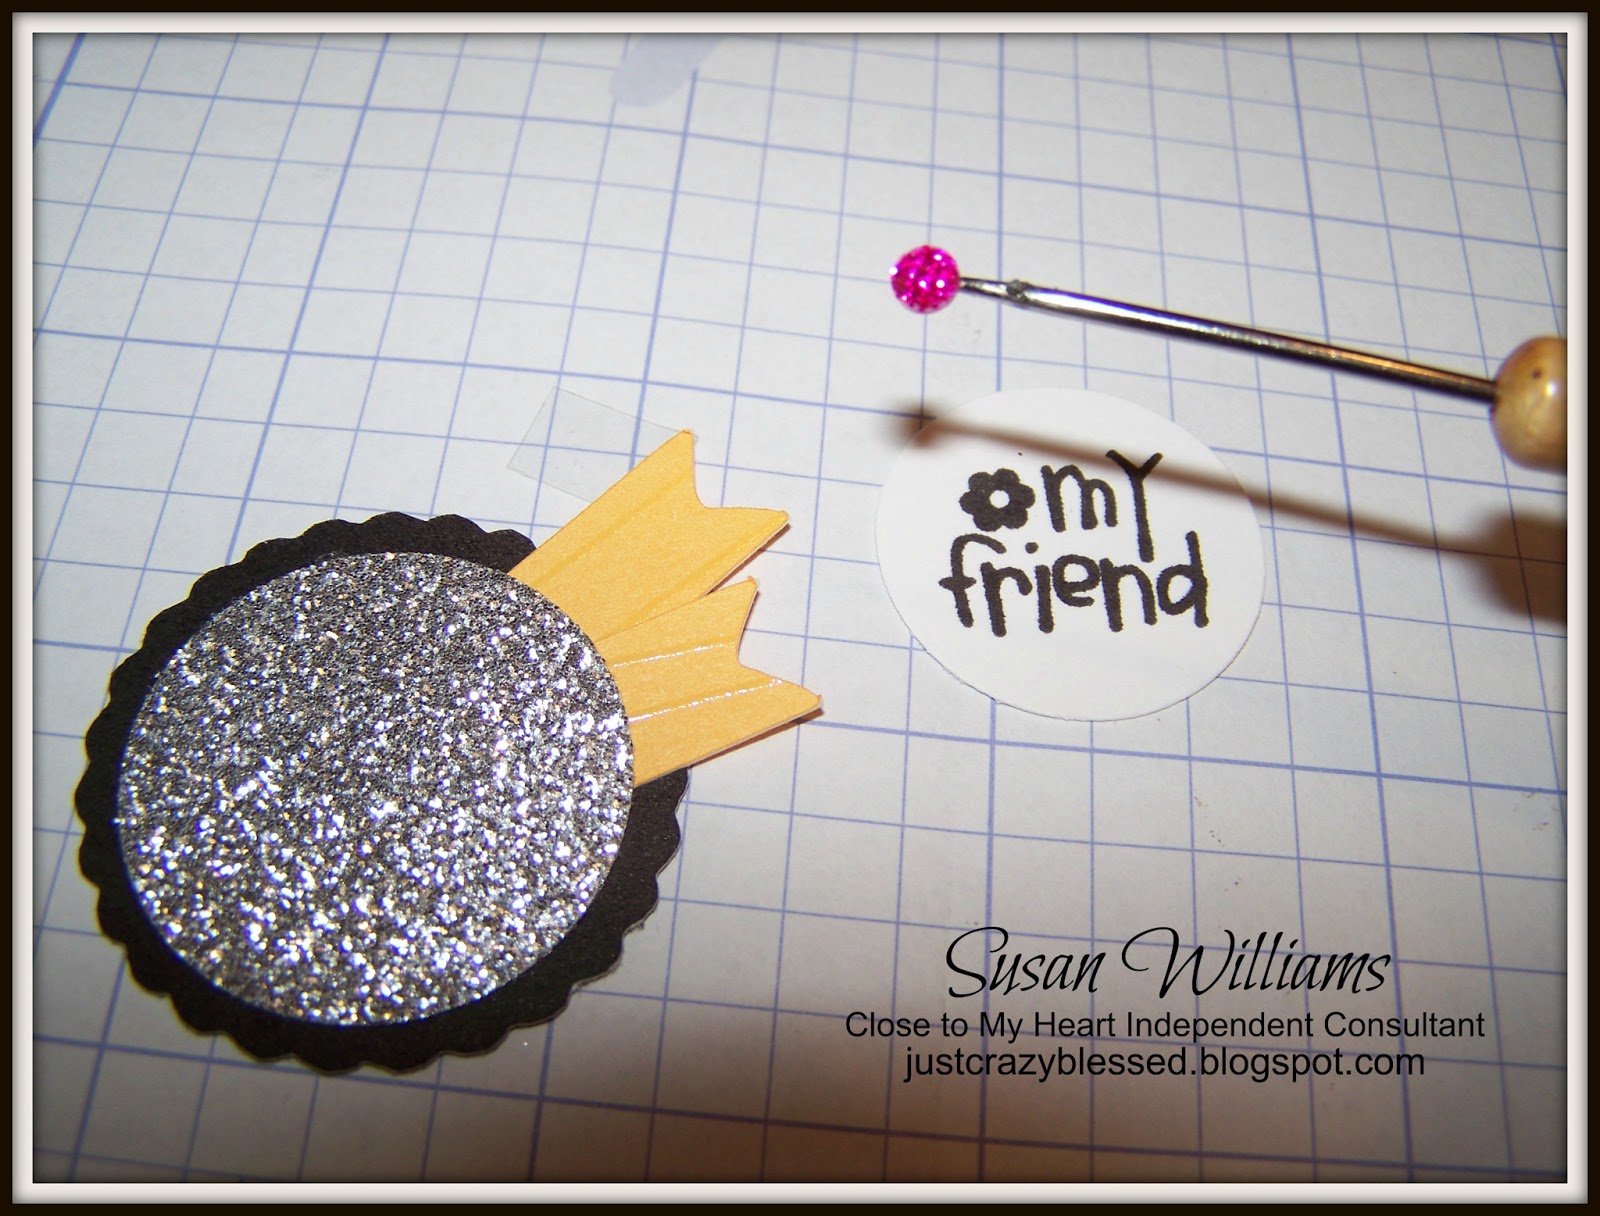
Adhere your assembled piece to the front of your Medallion.

Next, fold your Black label in half, using a bone folder for a good crisp fold.

Staple your Label onto the top of your baggie tray. Apply good strong adhesive onto the top of the stapled area.

Adhere your medallion to the front of your baggie, covering the staples.

Turn it over and Apply Adhesive onto the largest Grey circle provided and adhere on top of the stapled area.

Stinkin' Cute isn't it!? :)
Remember, you can purchase pre-cut/pre-stamped Kits shipped right to your door for only 2/$5. You can complete your purchase at the bottom of THIS Blog post from yesterday. :)
*There are a few circles missing from the picture below as I didn't realize they were laying on my floor instead of in my photo. :)

Thank you so much for Joining me!! How fun is this!!?? I would have never thought I'd enjoy Blogging...now if only my REAL JOB didn't get in the way of my FUN JOB, right!? :) :)
Blessings, Sus
what kind of bags are you using and where do you find them?
ReplyDelete