Showing posts with label Tutorials. Show all posts

Tuesday, November 12, 2013

Now they can hush....:)

Hi Friends!

Something just totally Fun Today! I was invited to join a design team over at Creative Craft Cottage Blog a while back...the team member who chose the challenge this month chose 'Texture'.  While it's no secret that I'm not a 'technique' junky I knew EXACTLY what I was going to show you the minute they announced this month's challenge! :)

Close to My Heart Introduced our very first Cricut Cartridge (Art Philosophy) in the Summer of 2011. Artiste followed in Summer of 2012 as did Artbooking this past summer! 

I, of course was totally on board! You already know I am SUCH a thrifty person, it's just my nature....so I can really see the wisdom in a larger initial purchase - I can get WAY MORE for my money than buying punch after punch after punch or die after die after die! I mean, it doesn't take a rocket scientist to do the math....! 

Each of our Cricut Collections have 700 images! Then each of those images can be sized at intervals as small as tenths of an inch! (Holy Cricut!) Then, taking into consideration how the free 'Cricut Craft Room' software factors into the equation.....I can bend, flip, rotate, stretch, weld, (list goes on) any of my images from my cartridges in Addition to the free images in the CCR Library! Seriously they are the Best Value for your hard earned money! :) 


Okay, so I DO have a point....I'm getting there! :) 

I've heard- since our partnership with Provocraft (Cricut) - that crafters LOVE every aspect of the cartridges with one exception.....they can not emboss! Well.....Now they can hush. :)  CHECK. THIS. OUT. 


I Stinking LOVE this card! Every single Detail makes my heart skip a beat! :) It is a very simple, clean looking card...which is Just my Style. :)


I know, I know....nothing spectacular about! Except the way I made. it! :) I embossed with my cricut! (LOVE!) 

Here are the steps I took to get this look! :) 

Chevron is Big right now and we have such a FABULOUS (Full Page) Chevron Overlay on our Cricut Artbooking Cartridge! 


I wanted to show you what the screen of the Cricut Craft Room looks like (if you are not already using the CCR - GET TO IT! It's free and totally Awesome!) 


I sized them so they would be sure to fit through my Cuttlebug machine.....then just copied and pasted as many as would fit onto my page.  

I cut 3 of the the overlays....next time I will cut 4 of them to give it a more defined emboss. :)


Don't throw away your negative pieces! They make perfect embellishments for other projects! :)


Okay.....so this is the Time consuming part! You will need to adhere all of the layers together.  I thought I'd skimp on my adhesive to make it faster but I ended up making a mess first time out of the chute gate! The overlays will shift when they are being run through the Cuttlebug so you will need to make sure that they are adhered very well.  

I used ATG for the outer edges and Bonding Memories Glue Pen-Fine Point for the inside sections. :)


 I know...it's alot of work but think of the money you are saving! And you are getting a CUSTOM Embossing plate to suit your personal preferences! :)


Next, just use it in the same way you would any other embossing plate! I lined it up JUST RIGHT for my cardstock! I loved how I could see right through it. :)


It gives such a nice crisp emboss! :) I absolutely Love this!


And!! The BEST part about Close to My Heart Cardstock.....the WHITE CORE! INSTANT TEXTURE Girls!!


How Fun! I already have thoughts of embossing with all of the Fancy card bases from our Art Philosophy Cartridge as well as all of the Theme Specific Images and flourishes from Artiste...and of course Artbooking with all of it's CRAZY AWESOME Overlays make embossing with our Cricut Cartridges a Paper Crafters Dream! an Absolutely UNIQUE Dream! :)

So, the next time you hear someone say Close to My Heart has no Embossing options....you just tell them to hush and show them how easy it really is. :) I LOVE getting the most out of my money spent, don't you?! :) 

I guess I really should share the inside of my card...it will be no surprise, you already knew it would match the front, didn't you? :) 


And SERIOUSLY.....how much do you LOVE that Woodgrain Washi Tape?! (GIDDY) 


Thanks for joining me girls! Sure do appreciate each of you!

Below is another great Video from Close to My Heart with information about our Cricut Collections! :)

Blessings, Sus 


Friday, May 31, 2013

Hershey Nugget Bag Tutorial


Yesterday I showed you another one of my "Treat Treasures", this Hershey Nugget Baggie with Topper! 


Today I'd like to show you how I created it! Remember, I have these ready in to ship in small kits of (2) for only $5.00!(shipping is included in the $5 price!)  Please see yesterdays post for information on how to purchase yours! :)

The Whisper Cardstock base piece measures 2.5" X 9" 


Your base will serve as the Nugget "Tray" so you will need to score 0.5" from each side lengthwise as well as 0.5" from the bottom edge. 


Using a Bone Folder, give the score lines a good crisp fold. 


 Make 0.5" cuts on both pencil marks as shown. 


 Place strong adhesive on the sections marked with the "X"


 The "flaps" with adhesive will adhere to the backside of the larger middle "flap" creating a box-like edge.


Now flip to the opposite end and trim off the top corners of your tray, as shown.


Next, moving to your nuggets...this template size will easily hold (8) Hershey Chocolate Nuggets.  Cover the backsides of each of the 1" X 3" strips with adhesive and adhere them to your Nuggets.


I did run a few strips of adhesive down the inside of my Tray just to keep them a little more secure.  This step is completely optional as they are fairly snug when inside the bags. 


Slide them into your bag...it's a great little fit, isn't it? (I love this stuff, LOL)


Okay, next let's put together the Medallion! Fan-fold your pre-scored medallion strip as shown.  


Place adhesive on both ends of the strip and secure them  together, Also cover the smallest grey circle (you have 3 included per kit) with adhesive.


Adhere your fan-folded medallion onto your circle (I'm showing you the upside down view) and press firmly.


Your dry adhesive will not be enough to hold your medallion in place, turn it over and fill the middle space with Liquid Glass.  


Place another of the Grey circles onto the top while it dries.  I also placed a couple of Acrylic blocks on top to ensure a good flat hold while the liquid glass was drying.  


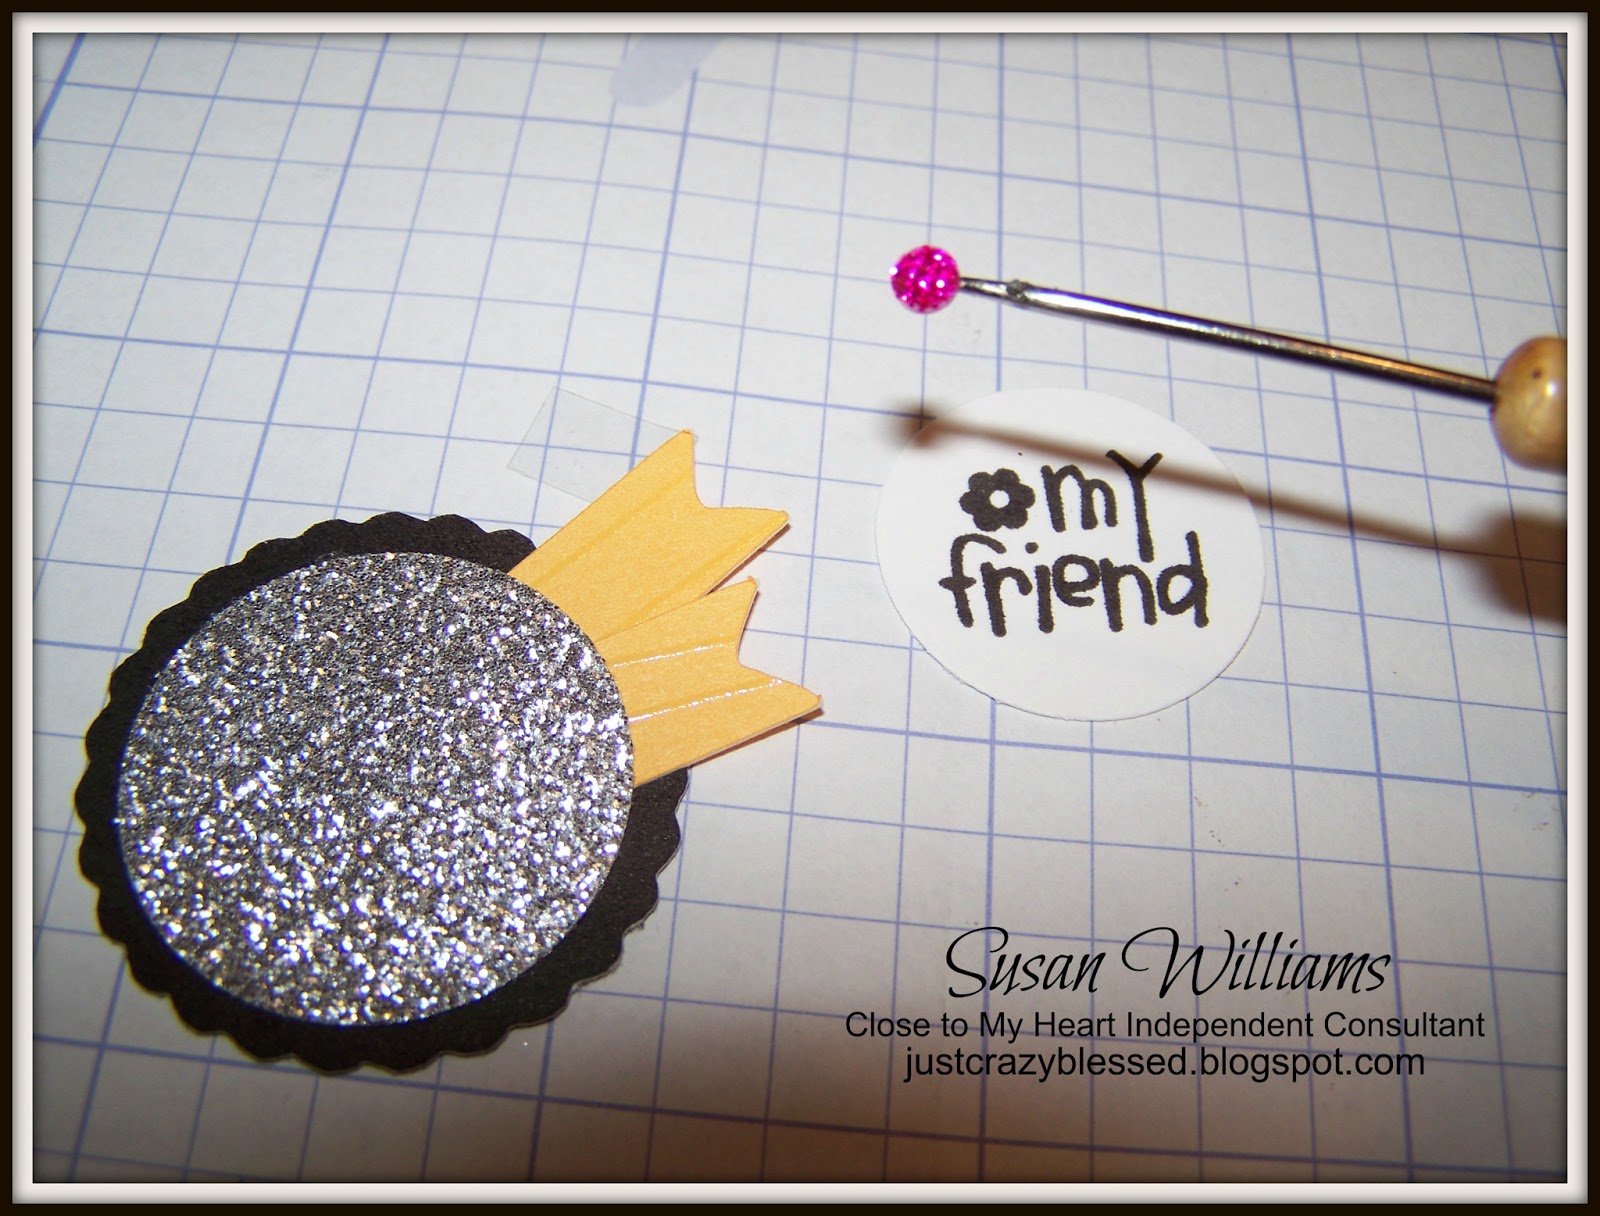
Begin building the piece to go on the front of your medallion as shown.


 Adhere your assembled piece to the front of your Medallion.


Next, fold your Black label in half, using a bone folder for a good crisp fold. 


Staple your Label onto the top of your baggie tray.  Apply good strong adhesive onto the top of the stapled area. 


Adhere your medallion to the front of your baggie, covering the staples. 


 Turn it over and Apply Adhesive onto the largest Grey circle provided and adhere on top of the stapled area.


 Stinkin' Cute isn't it!? :) 


Remember, you can purchase pre-cut/pre-stamped Kits shipped right to your door for only 2/$5. You can complete your purchase at the bottom of THIS Blog post from yesterday. :)

*There are a few circles missing from the picture below as I didn't realize they were laying on my floor instead of in my photo. :)


Thank you so much for Joining me!! How fun is this!!?? I would have never thought I'd enjoy Blogging...now if only my REAL JOB didn't get in the way of my FUN JOB, right!? :) :) 

Blessings, Sus

Tuesday, May 28, 2013

Paper Bag Pocket Tutorial

If you have followed my Facebook for a while then you already know how much I love these little things! Who would have thought a plain ole paper bag could be so cute, huh?! 

I learned this project from a fellow consultant, Aaron Brown....I don't think "Idol" is the right word but I have really looked up to her for a long time, she has projects that are just "me" and she is always so willing to share her techniques and ideas via video or blog posts.  If you'd like to take a peek at her blog it can be found here.

These Paper Bag pockets are so perfect for so many occasions....Most of the orders I get are for Kiddo birthday parties.  These are an order from a little girl who specified "Brown and Pink" and "camping"....I was really scratching my head with those requests. 

The Close to My Heart Clementine Paper kit had the "Brown and Pink" and had a kind of "country" feel to it.  I did stray from my Beloved Close to My Heart Artiste and Art Philosophy Cricut Cartridges for this project and pulled out the very first cartridge I ever purchased, "Camp out".  Inside the pocket of the bag there will be an additional card (not pictured) with printed party details (will be created closer to party time as details are still not finalized at this time) tucked inside.  And isn't the marshmallow a nice touch? :)


I'd love to show you how I created these......:) 

I buy the cheapo bags from the grocery store! I think these were 50 for about $1.25 (THRIFTY GIRL) 

I used the following sizes for my cardstock/paper pieces:

Sorbet Cardstock - 5" X 1.75"   
Saddle Cardstock - 5" X 2.5"   
Brown Pattern Cardstock - 5" X 1.5"   
Flowered/Paisley Pattern Cardstock - 4.75" X 2.25"
I also used a Zip Strip from the Clementine Level 2 Paper Kit and trimmed 1.5" off the end. You can use a .5" X 10.5" piece of cardstock in place of the Zip strip if you prefer.  


Using your Bone Folder (you will want very crisp folds for this project) fold your paper bag in half. (I like my backside to be "clean" so I folded it in such a way that the bottom of the bag (when opened with normal use) with all the seams are facing me (and will be covered with paper) Make sense?


Now, you will fold down the front flap....there are no exact measurements for this step but with the cardstock dimensions I have given you it will need to be approximately a 2" "folded down" flap, thus leaving about a 1.25" section of the bottom...I know, these are not the most descriptive instructions but follow me anyway, it might make sense later. :)


Adhere your cardstock pieces as shown to the inside of your pocket...you will notice how you are covering up the factory seams.


Now place adhesive where you see my pen marks, being careful to leave the "pocket". 


After you have adhered them together with firm pressure lift up the bottom "flap" and add your sorbet cardstock to the bottom of the pocket.  Then, as before, apply adhesive where you see my pen marks. I know....fanciest tutorial you've ever seen, huh?! HAHA Does anyone beside me speak "Hick" ? :)


Next add your front cover piece....When I first started making these my instinct was to trim up the Frazzled pieces of the bag edge but now I think it adds character.  I love when someone says "Oh My gosh, I can't believe that is an old paper bag!!" :)


Add adhesive to your zip strip (or cardstock strip).  This step isn't absolutely necessary but sometimes I like to add candy or other things to the pockets and having something "holding it together" in addition to the adhesive just makes it that much sturdier. :)


Wrap it firmly all the way around and if using a zip strip just trim off that 1.5" tail.  Be mindful where you place your seam as you will want to cover it.


I covered my seam with the little wooden sign and further embellished with a butterfly and a few sparkles as seen in the very first photo. 


These are SO easy to make and they can really reflect the personalty of the sender or the theme of the party! Here are a few others I've done in the past.  


I wish I would have taken pictures of all of them...had never expected to enter "Blog Land"! 

I hope you have enjoyed this short tutorial, and be sure to stop by Aaron's blog...she has great ideas, you will LOVE IT! :)  

Thank you for joining me!
Blessings, Sus