Showing posts with label Ebay. Show all posts

Wednesday, June 19, 2013

Claire is in DA HOUSE!

My Ladies have been asking for Claire Kits for a while....it seems like a very popular paper kit.  I finally had some time in between projects to work a few up! There are more to come of course! :)

Lots of Thanks for Jennifer Thompson Cox for the inspiration and of course the Stamp Goddess for her patterns. :) 

This 'So Sweet' Claire Layout is super simple but also super cute! You can find it for sale - among others - in my Ebay Shop or My Facebook Business Site.  


I do love all aspects of this layout...the Buttons and Glitter Gems being top of the list! :)


And it has Lots of Photo Spaces! :)


As well as Journaling Space! :) 


Come take a look at my inventory! or take a peek at THIS previous blog post about why my Pre-cut Layout kits are such a great value and time saver! :) 

If you'd like to purchase any of my pre-cut kits or if you should have any questions about kits or Close to my Heart please do not hesitate to Shout at me! You can email me HERE or message me on Ebay or Facebook! :)  

Blessings Friends!
Sus

Friday, June 7, 2013

Still Lovin' Chantilly!

Today I wanted to share with you one of my very Favorite layout Kits...I think I say that about all of them but really, this one is near the top! :) 

I don't feel like the Close to My Heart Idea book quite does the Chantilly product line the justice it deserves! The colors look a little muted on the pages...but oh my word! Get that beautiful paper in your hot little hands and you'll see what I'm talkin' about! Wowza! It is GORGEOUS!! It's so bright it just pops off the page! 

Here is my spin on the artwork located on page 19 of the Spring/Summer 2013 Idea Book!


I LOVE this layout! It includes some of my favorite embellishments! Would you look at that zipper lace trim!! and that Fabric!?


ECK! Do not be nervous about incorporating Fabric into your paper crafting!  Below is a video that speaks a bit about this very subject. :) I have also uploaded a picture tutorial on how to easily work with our Textiles here on my blog.


I Love all the elements that make this layout an eye catcher...the Chantilly assortment (they are the Coolest adhesive backed fabric covered badge buttons), the 
Pink glitter gems, pink buttons, bakers twine...Loooove it all! 


If you love this layout as much as I do and would like to see it in one of your albums be sure to visit my Ebay shop or my Facebook Business Page to purchase yours! I created 7 different Chantilly Layout Kits back in February and March.  They have been so popular I'm on restocking rounds 2 and 3 for most of them! I just created another 15 of this particular kit and it is ready for shipment immediately! :)

If you should have any questions regarding my Pre-Cut Layout kits please don't hesitate to contact me, It will be my pleasure to assist you! :)


Blessings, Sus

Monday, June 3, 2013

Make it a BANNER Day....er....Month!

Of course with my being a Consultant with Close to My Heart I think they are just TOP NOTCH but each month they continue to surprise me! 

Like most Direct Sales companies they offer limited time specials for their customers but MY WORD...CTMH just keeps shipping out the freebies! 

Throughout the entire month of June Close to my Heart will include one of our My Creations® Mini Banners (Z1736) with every $25 order that includes any A-D sized Stamp set! 


Do you want to know the BEST thing about this cute little Chipboard banner? It comes with (10) 3" X 4" Pennants in 4 different shapes...and EVERY SINGLE ONE of them has a coordinating Cut on the Close to My Heart Art Philosophy Cricut cartridge! The days of tracing and trimming are a thing of the past! Whoot! 

I want to share with you one of the Mini Banners I created last year for my Sister's baby shower! My nephew Jay (James Allen) has it hanging in his nursery at this very moment. :) 


His Nursery is all about the Outdoors and has a "Camo" theme so I strayed from my Beloved Close to my Heart paper for this project! 


I used the Art Philosophy for both the top and bottom layers of the banner pennants as well as the scalloped circle and font.  The cartridge also has multiple medallion cuts as well!

I actually created an entire baby shower using this camo paper and my art philosophy cartridge along with a few other beloved CTMH products! It was a huge hit and I think my sister loved it! 

I would love to show you some more of the projects I created for the baby shower, please join me tomorrow to have a look.   

In addition to the FREE BANNER with $25 orders I'm sweetening the deal! Bump your order up to $50 and include (2) A-D sized stamp sets and Close to my Heart will send you 2 of the My Creations Mini Banners AND I will send you one of my Pre-cut Layout Kits FREE! I'll even ship it right to your door! 


Annnnnnd, don't forget....all $50 orders will also qualify you for the June Stamp of the Month for only $5! 


Do you realize that your purchase of $50 will qualify you to receive free product in the amount of $38.85!? WHOOT! 

All you must do is Join the "Banner June" Gathering on my website and place your order of $50! I'll do the rest! 

Please, ALWAYS, feel free to email me with any questions you might have! It will be my pleasure to assist you! If you enjoy Facebook I'd like to invite you to "Like" my Close to My Heart Business page! I post lots of CTMH information, Kit specials, artwork, etc. on there as well. :) 

Thank you for joining me, I'll see you back here tomorrow with more Artwork to share! :) 
Blessings, Sus


Wednesday, May 29, 2013

Lovin' me some Dakota!

I've been showin' so much love to our DREAM POP Campaign that I wanted to pop in here with some refreshing  artwork from my ALL TIME-FOREVER FAVORITE Paper Kit, Dakota

And No, it has nothing to do with the fact that it bears my kiddos Namesake...okay, it might have something to do with it. We are Country Folks...we love our Horses, cattle, being outdoors, and getting Muddy! This kits just screams COUNTRY! 

Did you see the artwork in the Close to My Heart Autumn Winter 2012 Idea book?! It has the most Darling projects and many feature my Friend, Brandy and her family....who are also Country Folk. I love the sisterhood of Close to My Heart where we can find others who have similar lifestyles as our own, it doesn't take much time at all to become Friends! 

Here is a Pre-Cut Layout kit I've created using Dakota! 


I tossed in a few buttons from the Black/Grey assortment and some Burlap thread ....I think it turned out adorable! :)


This kit and many others are available for purchase in my Ebay Shop, my Facebook Business Page, or by simply emailing me

I have a previous post with more detailed information on my pre-cut layout kits...take a look here.

Thanks for joining me again friends!
Blessings, Sus

Monday, May 20, 2013

More Textiles!?

I Hope you aren't growing tired of my recent obsession with Textiles! :)  

I put this kit together over the weekend and have almost sold out of it thus far! (Big Smile!)


The For Always Textiles pair so well with the electric papers from the Dream Pop Kit! Add some Black Glitter paper...a couple glitter buttons...PERFECT!


Not sure how to put together the ruffled textile pieces? I have made it super easy to learn, just check out my RUFFLED TEXTILES TUTORIAL.


You can purchase this, or other Pre-Cut Layout Kits from a few places...My Facebook Business Page, My Ebay Shop, or by browsing the inventory at either place and emailing me your order.

To receive a FREE Dream Pop Pre-cut Layout Kit from me just take advantage of this Double Dippin' Special.....


All of this PLUS!!!! a Free Pre-Cut Dream Pop Layout Kit (custom designed by myself) shipped right to your door (value of $14.95+) All just for shopping with me! :)  To receive this Fantastic savings you must click JOIN on one of my open Gathering tabs! As soon as I've seen your order I will get your Free Kit on it's way! :)

If you should have any questions concerning this special please do not hesitate to contact me, it will be my pleasure to assist you. :)


All for today!
Blessings, Sus

Wednesday, May 15, 2013

I'll have my DREAM POP with a side of Buttercup, Please!

I am so IN LOVE with this new Dream Pop Paper! I've heard the concern over the "Pop Colors" and the fact that we do not have matching ink colors and embellishments within our core Close to my Heart product line.  


For me, personally, I am a Grey and Black lover...I think they can make any color stand out, so I wasn't worried in the least concerning the "Pop Colors", however many were.  I wondered which non-neutral colors I could use to match this gorgeous paper, surprisingly - BUTTERCUP was one that looked SO great!


I think it went so well with these bright colors, I was surprised as it was not one on my list to try.  I even used some of the Buttercup fabric from the Chantilly Textiles assortment!


And look at that darling pink pattern! It also looks great next to the brights in the Dream Pop, I think that's on my "project to-do list" coming up. :)


And who doesn't love some Glitter!? A sparkly layout just makes me smile! :) I trimmed my "LOVE YOUR FACE"  on my cricut with the help of the Cricut Craft Room to weld my letters. (If you are not using the CCR already let me tell you, YOU ARE MISSING OUT! It is so easy and Totally Free!).  


I had some small ovals from the negative spaces of my cuts and didn't want to throw them away....I thought they added a  nice embellishment factor behind my buttons. :)


I did have a friend inquire how I created the smooth straight lines with my Bakers Twine....(it's not much of a secret that I am sewing-illiterate) so I cheated.  I just poked a hole in each of my 4 corners about half an inch from the outer edge, pulled my bakers twine snug and secured on the back with scotch tape.  Easy as can be and no stitching required. :) 

Thank you for letting me share another Dream Pop Project with you!  I created 12 of these over the weekend and I've already sold 9 of them! You can purchase your own pre-cut layout of this design by shopping in my Ebay Shop, by Emailing me directly, or by reserving via my 
Facebook Business Page.  (Shopping outside of Ebay will save you a bit due to my not having to pay all those yucky fees.)  :) :) 

Thank you for joining me Friends!
Blessings, Sus


Thursday, May 9, 2013

AAAAAND Another Kit!

I am so excited to be sharing my Newest Dream Pop Kits with you! They've been flying out my craft room door as fast as I can make them! Many LATE (really late) nights and Early mornings lately but it is MUSIC to my ears to hear someone tell me how much they enjoy my kits! :) 

Here is another one I've put together....


This picture just does not do it justice! Like all the Dream pop, this page is just PLAIN SHINY! And how about that Cute little journaling square!? It was cut with the Close to My Heart Art Philosophy Cricut Collection......(My favorite of all time!)


The Black Glitter Buttons and Black Shimmer Trim looks so great with the Whisper Base pages and Grey & Mint Pop colors from the Dream Pop Paper Pack! :)


I Love the Medallions! The Close to My Heart Artiste Cricut Collection has a number of different Medallions!


If you'd like to purchase this, or any of the other kits in my inventory please don't hesitate to Email Me or purchase from my Ebay Shop!

That's all for today! :)
Blessings, Sus
Wednesday, May 8, 2013

Just another Kit.....


Happy Wednesday! 

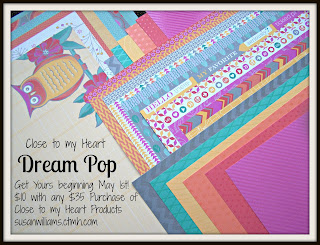
I just wanted to share with you - yet again - another Dream Pop Pre-cut Layout kit that you can find available for purchase in my Ebay Shop or just by Emailing me!


I LOVE this kit! It's Crazy Bright! The Glitter paper really sets it off! :) I love all elements about it and they are all included in your kit! All papers are cut right to size! (I've done all the hard work for you) You will receive Journaling strips (that you can trim to your desired length, Washi tape, Sparkles, Glitter button, a Pre-cut, Pre-scored Medallion, My Creations small paper pouch, various Cricut-cut Images, base pages, and White Daisy Photo mats, all sealed in one of Close to My Heart's New, reusable Zip Top Bags with a color photograph of the completed layout for reference. They can be assembled in NO TIME FLAT! :) 


My favorite part of the page is the Pull-out Journaling tag, hidden inside the paper pouch :)


I think the Optional Journaling strips give it just the "right touch" :)


 If you'd like to purchase this, or any other Pre-cut Kits in my inventory please contact me and I will be happy to arrange a transaction for you! :)

Blessings Friends! Sus


Tuesday, May 7, 2013

Ruffled Textiles Tutorial

Yesterday I shared this layout with you


Today I'd like to walk you through how I created the ruffled textile pieces. 

Let's get to it, Shall we?! :) 
 
Similar to the Ruffled Ribbon I created (tutorial here) last week, I started with cardstock bases in the length I needed for the textiles.  

My pieces for this project measured 1.75" X 4.5" and 1.75" X 2.5" 


 Since my bases were 1.75" wide I cut my textile strip 2.5" wide to give adequate room to hem the edges. 

Close to my Heart Textiles are about 14" wide so my piece ended up being 2.5" X 14" 


I'm not a great big fan of lugging stuff around and one night I had a lightbulb turn on inside my head...instead of dragging my iron and board into my studio I grabbed my flat iron! Whoot! :) Yes, I really am using a $100 flat iron for a scrapbook page....(my husband would just shake his head!)

It really works like a charm! And PORTABLE! With just a couple passes you are wrinkle free! 


Now that you have a nice flat piece to work with turn it over to the backside.  Using your ruler and  Chalk Marker measure and draw a line .25" from the top and bottom "rough edges".  This step is not necessary but it helps in getting a straight edge when you are creating your "faux hem".


Run adhesive, (like tombow) on the outside edges of your chalk line.


After your adhesive is applied begin folding over the rough edges to create a nice faux hemmed edge. 


Once again, break out ole trusty flat iron and give the hems a great crisp! Holy Smokes, wasn't that easier than dragging your iron around?! :)


Now you should have a piece of hemmed fabric approximately 2" X 14".  You will need to cut it into two separate pieces, one 9" X 2" and the other 5" X 2"

Now add a bit of adhesive to the first end of your fabric.


Adhere one of your bases to the end of your fabric as shown. 


Place a bit of adhesive on the outer edges near the end and fold in the fabric that extends past your base.


Next, cover the entire cardstock base with adhesive, be generous.


Begin ruffling your fabric onto the sticky base, it does not need to be perfect, just make sure you do have enough to reach the other end.  If you goof, just peel it up and start over. :)


After you've ruffled to the opposite end, flip your base over and trim off any excess, then run a strip of adhesive on the backside and adhere the fabric ends to it.


I topped my ruffle with some Black Glitter Paper and a zip strip from the Dream Pop Paper collection.  My glitter paper pieces measured 5.5" X .75" and 3.5" X .75", my zip strips were also 5.5" and 3.5" in length.


Apply liquid glass onto the backsides of the glitter paper and adhere it to the fabric, press firmly. 


Fold the ends to the underneath side of the ruffled base. Not pretty, good thing we'll never see it. :)


Since I was generous with the Liquid Glass I placed my pieces onto a small scrap of a transparency sheet (hard to see in the photo), this way any glue that seeps out won't accidentally glue my pieces to something they aren't supposed to be glued to. :)


Now SMASH them! :) Toss something heavy on top of your pieces and leave them a while.  Five Close to my Heart Idea books work perfectly! :) 


Thank you for joining me friends, I do hope that if you are not already using Close to My Heart's Textiles in your artwork then I've encouraged you to try them! It's really easier than it looks! :)

Feel free to share my tutorial on your Facebook pages, Blog posts, or on Pinterest! :) 

If you loved the Kit pictured today, it is available for purchase in my Ebay Shop or by emailing me directly. :) 

Blessings, Sus