Showing posts with label Dream Pop. Show all posts

Thursday, December 19, 2013

'Crazy Quick' Dream Pop Thank You Card Kit

I have had SOOO Many requests lately for Card Workshops!  I'm up to my ears in projects right now and it's only going to continue to get busier next month (Awesome things coming next month by the way)! 

Here is a Super quick 'Thank You' Card Workshop I put together using one of my ole favorites....Dream Pop! 

Truely, these cards are SO CUTE! They are bright and cheerful...the pictures just do not do them justice! :) 

You will receive the following to create (2) each of the six cards!


Pre-cut Embossed Cardstock bases (unfolded), inside card  liners, & Misc. Patterned Papers
(12) Envelopes
Black/White Bakers twine
Clear Buttons
Clear sparkles
Silver Metal studs
Slate Twist Tie
Full Roll of Close to My Heart Slate Washi Tape
Your very own My Acrylix 'A True Thank You' Stamp Set!
Information sheet with Color Photos of Competed Cards for assembly assistance.

All for only $25! That's only $2.08 per card! And you get to keep the stamp set as well as have about 2/3 of a roll of Washi Tape Left!

These kits are shipping Now for only $4.00! 

If you should have any questions concerning this - or any other of my kits for sale please contact me { HERE

Friday, June 14, 2013

Dream Pop 'Sweet Birthday' Card

I'm not sure how long it will take me to be tired of the Dream Pop...it is such Fabulous paper, I do hope you purchased some last month!  


This card has so many Elements that I Absolutely LOVE! Glitter Paper, Waxy flax, Buttons, Pin Clips...I LOOOOVE it!


You can find all of those Darling embellishments listed above right here on my Close to My Heart Shopping Website!

The embellishments even spilled over into the inside! :)


Do you love this card? Want to send it to someone special in celebration of their birthday? Well you CAN! 

I have cut a few pre-stamped/pre-cut 'card kits' for this project and they are available for purchase at the bottom of this post! 


These kits are a Fantastic Price! Only $4 (including shipping to you) each....That's a HALLMARK STEAL! :)

Click on the 'buy-it-now' secure  link below to purchase through Paypal, you can also message me on Facebook or submit an email to reserve yours today! :)

Wednesday, June 5, 2013

Sweet as Honey!

I love everything about this card! I love the Dream Pop Of course, the Glitter Paper, the sparkles, Burlap, and my favorite is the Clothespin! Love it all, I also might be indulging in my recent Hexagon obsession - juuuuust a bit! 


It's actually so super simple but I think it makes a big statement! :)


And the inside is just as cute! I just can't bear to leave the inside of a card blank! :)


Would you enjoy creating this card and giving it to a Loved one? Well, you can! I have created several of these card kits for purchase! They are ready to ship immediately and at a total price - shipping included - of only $4 it's a Hallmark STEAL! :)


If you'd like to purchase one (or more) please just click the Paypal "Buy it now" link at the bottom of this post and you will be re-directed to a screen showing your purchase and asking for your paypal log-in information.  I assure you, it is completely secure! 

If you do not already have a paypal account but would like to purchase a kit anyway please Email me and I'll be happy to complete the transaction with you.  I do recommend Paypal to everyone! I have been using it for many years and have always been satisfied! My favorite part of Paypal is my free Debit card...every time I use it I get CASH BACK into my account. Looooooove it! :)

Thank you for joining me once again today friends!
Blessings, Sus


Friday, May 31, 2013

Hershey Nugget Bag Tutorial


Yesterday I showed you another one of my "Treat Treasures", this Hershey Nugget Baggie with Topper! 


Today I'd like to show you how I created it! Remember, I have these ready in to ship in small kits of (2) for only $5.00!(shipping is included in the $5 price!)  Please see yesterdays post for information on how to purchase yours! :)

The Whisper Cardstock base piece measures 2.5" X 9" 


Your base will serve as the Nugget "Tray" so you will need to score 0.5" from each side lengthwise as well as 0.5" from the bottom edge. 


Using a Bone Folder, give the score lines a good crisp fold. 


 Make 0.5" cuts on both pencil marks as shown. 


 Place strong adhesive on the sections marked with the "X"


 The "flaps" with adhesive will adhere to the backside of the larger middle "flap" creating a box-like edge.


Now flip to the opposite end and trim off the top corners of your tray, as shown.


Next, moving to your nuggets...this template size will easily hold (8) Hershey Chocolate Nuggets.  Cover the backsides of each of the 1" X 3" strips with adhesive and adhere them to your Nuggets.


I did run a few strips of adhesive down the inside of my Tray just to keep them a little more secure.  This step is completely optional as they are fairly snug when inside the bags. 


Slide them into your bag...it's a great little fit, isn't it? (I love this stuff, LOL)


Okay, next let's put together the Medallion! Fan-fold your pre-scored medallion strip as shown.  


Place adhesive on both ends of the strip and secure them  together, Also cover the smallest grey circle (you have 3 included per kit) with adhesive.


Adhere your fan-folded medallion onto your circle (I'm showing you the upside down view) and press firmly.


Your dry adhesive will not be enough to hold your medallion in place, turn it over and fill the middle space with Liquid Glass.  


Place another of the Grey circles onto the top while it dries.  I also placed a couple of Acrylic blocks on top to ensure a good flat hold while the liquid glass was drying.  


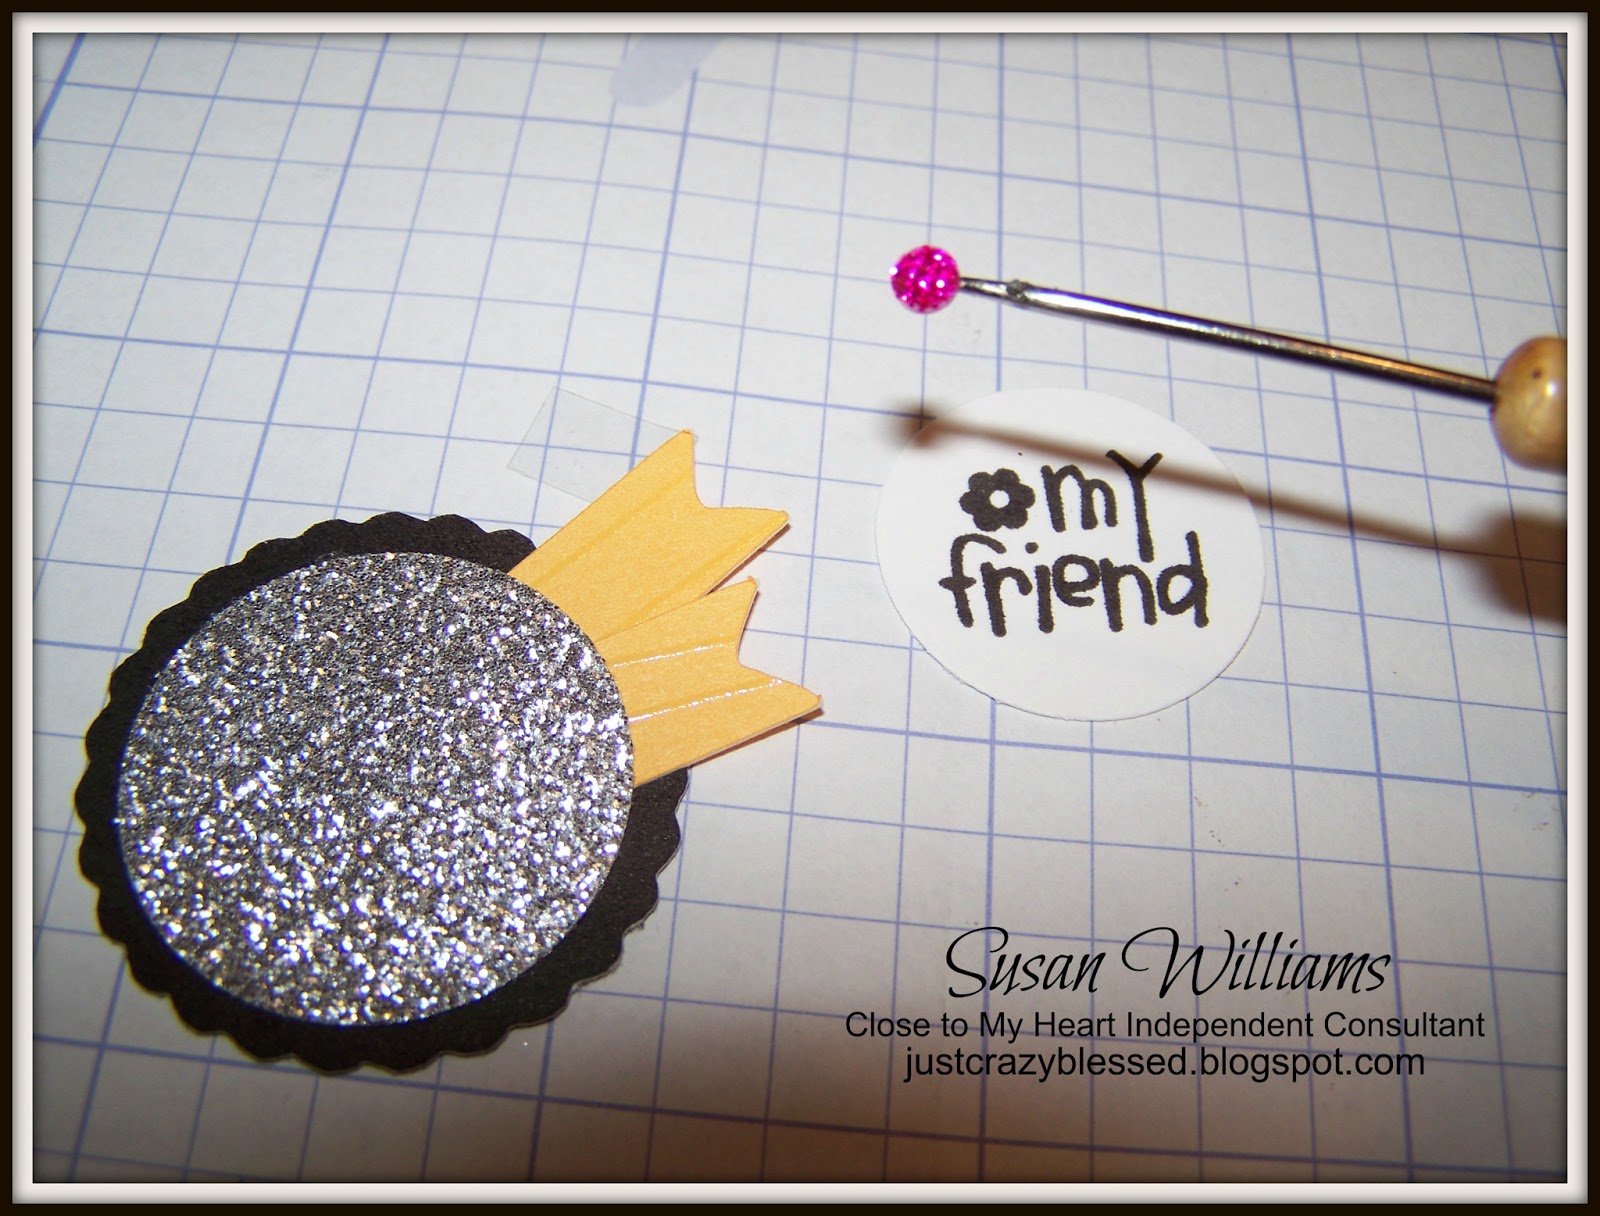
Begin building the piece to go on the front of your medallion as shown.


 Adhere your assembled piece to the front of your Medallion.


Next, fold your Black label in half, using a bone folder for a good crisp fold. 


Staple your Label onto the top of your baggie tray.  Apply good strong adhesive onto the top of the stapled area. 


Adhere your medallion to the front of your baggie, covering the staples. 


 Turn it over and Apply Adhesive onto the largest Grey circle provided and adhere on top of the stapled area.


 Stinkin' Cute isn't it!? :) 


Remember, you can purchase pre-cut/pre-stamped Kits shipped right to your door for only 2/$5. You can complete your purchase at the bottom of THIS Blog post from yesterday. :)

*There are a few circles missing from the picture below as I didn't realize they were laying on my floor instead of in my photo. :)


Thank you so much for Joining me!! How fun is this!!?? I would have never thought I'd enjoy Blogging...now if only my REAL JOB didn't get in the way of my FUN JOB, right!? :) :) 

Blessings, Sus

Thursday, May 30, 2013

Dream Pop Nugget Bags


I Love giving little Treat Treasurers to others! Right now I need to get my stash replenished so I have created a few new projects to show you! 

I love the Hershey Nuggets! They are so easy to cover with my favorite Paper, of course I used more of the Dream Pop Paper with this project....LOVE THAT STUFF! :)


How cute is that?! And oh my word....SO SIMPLE! :)


I would love for you to join me tomorrow, I will have a Photo Tutorial on how I created these Treat Treasures. It will also serve as the step by step directions for the Kits I have prepared for this project. 


If you'd like to purchase a Kit to complete this project in your own home you are invited to take care of it right here on my blog...below you will find the paypal information needed to make your purchase.  I will ship as soon as I get notification of your payment.  

I am selling them in sets of (2) and for shipping purposes they will not come with the Hershey Nuggets, rest assured you can easily find them in any candy isle of your Grocery store, Walmart, etc. 

The cost for (2) sets of the Nugget bags - including shipping to you is only $5.00! You will receive 2 of everything pictured here (there are a few pieces missing that I didn't notice when I was taking the photo).


If you should have any questions about how to purchase these please SHOUT at me! I'm a new Blogger and this is the First time using this particular PayPal feature! :) 


Sorry! Sold Out! 

Monday, May 20, 2013

More Textiles!?

I Hope you aren't growing tired of my recent obsession with Textiles! :)  

I put this kit together over the weekend and have almost sold out of it thus far! (Big Smile!)


The For Always Textiles pair so well with the electric papers from the Dream Pop Kit! Add some Black Glitter paper...a couple glitter buttons...PERFECT!


Not sure how to put together the ruffled textile pieces? I have made it super easy to learn, just check out my RUFFLED TEXTILES TUTORIAL.


You can purchase this, or other Pre-Cut Layout Kits from a few places...My Facebook Business Page, My Ebay Shop, or by browsing the inventory at either place and emailing me your order.

To receive a FREE Dream Pop Pre-cut Layout Kit from me just take advantage of this Double Dippin' Special.....


All of this PLUS!!!! a Free Pre-Cut Dream Pop Layout Kit (custom designed by myself) shipped right to your door (value of $14.95+) All just for shopping with me! :)  To receive this Fantastic savings you must click JOIN on one of my open Gathering tabs! As soon as I've seen your order I will get your Free Kit on it's way! :)

If you should have any questions concerning this special please do not hesitate to contact me, it will be my pleasure to assist you. :)


All for today!
Blessings, Sus

Friday, May 17, 2013

Anything but Clutter!

I Hate clutter! Don't you? I especially can't stand clutter in my studio...before you know it it's taken over the place and it's impossible to find anything or get any project accomplished! 

My being such a THRIFTY GIRL I have been making myself USE UP ENTIRELY my packages of embellishments as to not multiply the clutter!


This "cluttered" card was inspired by Aimee Cretsinger and was the result of my wanting to use up a few leftovers here and there.  It turned out a bit more eclectic than my normal style but I LOVE IT! It's so pretty I just can't give it away yet, I plan to duplicate this card multiple times before sending the original. 


I grabbed pieces from several different packages...as you can see, there is a resin piece from the For Always Assortment, a Clear Sparkle, a button from the Slate Mini Medley, a few strips of Washi tape, and my Favorite embellishment is the Burlap Thread! Did you know you can snip out only a few threads from the burlap ribbon for tying?! LOVE!


I grabbed a few of my tiniest scraps from my Dream Pop Paper Kit, paired them with Slate and White Daisy Cardstock, and stamped a sentiment using my VERY Favorite Close to my Heart Stamp set - Casual Expressions


Check out all those red lines for this set! In case you were not already aware...the stamp images with a red outline are Cricut compatible! So...Great News for those who dislike trimming images! Cut your images (the size is printed directly on the stamp carrier sheet) with your Cricut Art Philosophy or Artiste Cartridges, stamp your chosen image (and how easy is it with totally clear stamps & blocks!? Whoot!), Done! How spoiled are we?!

And of course, can't leave the inside bare....used up a few more left overs there too!


So Friends....Word for the day, USE UP YOUR CLUTTER! Turn it into something Spectacular! :) 


Thank you for joining me once more....I'm really enjoying blogging, I do hope you are as well! 
Blessings, Sus